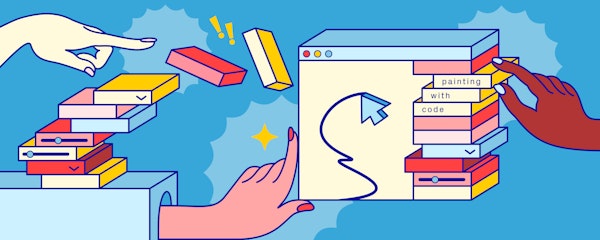
How to Paint with Code: Building Your App
There's a whole world of possibility in creating your own digital painting tools. You'll probably be familiar with painting software like Procreate or Photoshop – or even MS Paint or Kid Pix for all you nostalgic 90s kids out there – but did you ever think to build your own? In this guide, you'll create your own painting application with a creative coding Javascript library called p5.js. Let's go!
This is the second guide in our Painting with Code series, and we'll combine the unique paintbrushes we created in the first guide into a single painting application. Then, to further customize how we paint in the browser, we'll create an interactive toolbox full of buttons, sliders, color pickers, and more.
Here is a live demo of the painting application we'll build together, which includes the following features:
A dropdown menu for selecting the paintbrush
Buttons for saving the canvas as a JPG image, clearing the canvas, and painting with rainbow colors
Sliders for changing the brush size and opacity
Color pickers for changing the paint color and background color
Keyboard shortcuts
You should start with the first Painting with Code guide to get the most out of this tutorial, which shows you how to code 10 different paintbrushes as an introduction to the p5.js creative coding library. You should also be familiar with some fundamental concepts of Javascript, such as functions, for loops and arrays.
Okay, enough chitchat — let's start building our painting app!
Getting started
Setting up our project files
We'll start by setting up our project's code files. We recommend you build your project in the SuperHi Editor, but you could also use any other code editor that you're already acquainted with.
Keep in mind that you'll need to set up a local server to view your p5.js projects in the browser if you decide to use a different code editor. Otherwise, you you may run into CORS errors. Check out this guide to learn how to set up your web projects in a different code editor, as well as the p5.js website's Getting Started page.
First, create the following four files in your project:
index.htmlwill hold our HTMLstyle.csswill hold our CSSpaintbrushes.jswill hold all of our paintbrushes. These are the Javascript functions we wrote in the first Painting with Code guideapp.jswill be the Javascript file that holds the main logic of our painting application
Code Checkpoints and tips for debugging
You'll find toggle menus labeled as ✅ Code Checkpoints peppered throughout this guide. These contain the code that we've written up until that point and you can reference this to make sure you have a working application at each step along the way.
To learn more about debugging your Javascript code, check out these resources:
I'll also introduce many built-in functions from the p5.js library throughout this guide, and I'll provide reference links to the p5.js documentation for each one. Feel free to explore the p5.js documentation yourself as you follow along.
Setting up our HTML
We'll start setting up the overall structure of our website in our index.html file. There's two main <section> tags: the first <section> will hold our painting canvas, and the second <section> will be our toolbox.
Creating our canvas container
Our first <section> tag will hold our painting canvas. We'll refer to it as our canvas container throughout this guide, and as such we'll give it a class of "canvas":
<section class="canvas">

</section>
Right now our canvas container is an empty <section> tag, but we'll later use p5.js in our Javascript code to dynamically create a <canvas> tag inside of this <section>.
Creating our toolbox
Our second <section> will be our toolbox which holds all of our buttons, sliders, and painting tools. We'll give it a class of "toolbox".
<section class="toolbox">

</section>
We'll create four <div> tags inside of our toolbox to represent the four toolbox categories. Organizing our tools into categories helps the user to find each tool in the painting app interface. We'll give each of these <div> tags a different class for the category name: "canvas-tools", "painting-tools", "styles-tools", and "background-tools":
<section class="toolbox">
  <div class="canvas-tools">
  </div>

  <div class="painting-tools">
  </div>

  <div class="styles-tools">
  </div>

  <div class="background-tools">
  </div>
</section>
We'll also give each toolbox category a label, by nesting an <h2> tag inside each of these <div> tags:
<section class="toolbox">
  <div class="canvas-tools">
    <h2>Canvas</h2>
  </div>

  <div class="painting-tools">
    <h2>Painting tools</h2>
  </div>

  <div class="styles-tools">
    <h2>Styles</h2>
  </div>

  <div class="background-tools">
    <h2>Background</h2>
  </div>
</section>
Later, we'll add Javascript code to fill these toolbox categories with <button>s, <input>s, and other interactive elements.
Linking our Javascript files
We'll create three <script> tags at the bottom of our index.html file to link the p5.js library and our two Javascript files to the project's HTML.
<script src="https://cdnjs.cloudflare.com/ajax/libs/p5.js/1.3.1/p5.min.js"></script>
<script src="paintbrushes.js"></script>
<script src="app.js"></script>
Be sure to write the three <script> tags in this order, because the order in which you load your scripts will affect which resources are available to which files.
Since our
app.jsandpaintbrushes.jsfiles both use the p5.js library, we need to load p5.js first.Since
app.jsrefers to the JS code inside thepaintbrushes.jsfile, we loadapp.jsafter it.
✅ Code checkpoint 1
Setting up our CSS
Now that we have our site structure coded in HTML, we can move on to styling the layout in CSS.
Importing our Google fonts
We'll start our styles.css file by importing two Google fonts, called Lexend Deca and Nunito, which will be used to style the text in our painting application:
@import url('https://fonts.googleapis.com/css2?family=Lexend+Deca&family=Nunito&display=swap');Styling the <body> tag
Next, let's write some CSS rules for our <body> tag.
We'll set the
<body>tag'smarginto0to make sure our canvas fills the browser window.We'll hide the scrollbars with
overflow: hidden;.The default
background-colorwill be white, using the hex code#ffffff.We'll also style the type with the
font-family,font-size, andline-heightproperties.
body {
	margin: 0;
	overflow: hidden;
	background-color: #ffffff;

	font-family: Nunito, sans-serif;
	font-size: 14px;
	line-height: 1;
}
Styling the two <section> tags
Next, we'll style up the two <section> tags so they'll sit side-by-side. Our canvas container will fill the left side of the browser window, and the toolbox will be a narrow sidebar on the right side.
We'll style both of our <section> tags so they'll fill the whole height of the browser, from top to bottom. We'll use fixed positioning for this, and set the section height to 100vh:
section {
	height: 100vh;
	position: fixed;
	top: 0;
}
Styling the toolbox
We want our toolbox to display as a narrow sidebar on the right side of the browser.
We'll set its
widthto180pxand fix its position to therightedge of the browser window.We'll also set its
background-colorto white and add a thin dark line to its left edge by setting itsborder-leftproperty.We'll later on use Javascript and p5.js to fill the toolbox with buttons, sliders, and other interactive elements. To make sure everything fits in the toolbox, we'll turn it into a
flexcontainer and set itsoverflow-yproperty toscroll.
section.toolbox {
	right: 0;
	width: 180px;
	overflow-y: scroll;

	background-color: #ffffff;
	border-left: 1px solid #545454;

	display: flex;
	flex-direction: column;
}
Styling the canvas container
Now that our toolbox is fixed to the right side of the screen, let’s style the canvas container so it fills the rest of the browser window on the left.
We'll fix it to the
leftside of the screen, and set itswidthto the difference between100vw(which is the total viewport width) and180px(which is the toolbox width we set above).We'll later use Javascript to dynamically create a
<canvas>element that sits inside of this<section>tag. To make sure the<canvas>element stays centred inside its parent<section>, we'll turn this<section>tag into aflexcontainer and set itsjustify-contentandalign-itemsproperties tocenter.
section.canvas {
	left: 0;
	width: calc(100vw - 180px);

	display: flex;
	justify-content: center;
	align-items: center;
}
Styling the toolbox categories
Next, we'll add some padding and bottom borders to the four <div> tags inside the toolbox. We can use the CSS rule section.toolbox > div to select only the <div> tags that are direct child elements of the toolbox.
section.toolbox > div {
	padding: 20px 16px 8px 16px;
	border-bottom: 1px solid #545454;
}
Styling the toolbox category labels
We'll also style up the <h2> tags that label the toolbox categories:
h2 {
	margin-bottom: 24px;

	font-family: Lexend Deca;
	font-size: 14px;
	text-transform: uppercase;
}
And we're done with writing our CSS for now! I explained each portion of the CSS briefly, but check out these resources if you'd like to learn further about how CSS works:
✅ Code checkpoint 2
This is what our project looks like now that we've set up our HTML and CSS:
Setting up our Javascript with p5.js
Let's shift our focus to writing Javascript with the p5.js library!
Compiling our paintbrush functions into paintbrushes.js
We'll start by putting all of our paintbrush functions from the first Painting with Code guide into one Javascript file called paintbrushes.js, so we can use them all on the same canvas. For your convenience, I've included the code for each of our paintbrush functions in the checkpoint below.
✅ Code checkpoint 3
Setting up the global variables in app.js
Let's switch over to our app.js file, where we'll write all of the main code for our painting application. We'll start by declaring the following three global variables at the very top of our app.js file: toolboxWidth, canvas and bgColor.
Our first global variable will be toolboxWidth, which gives us the width of our toolbox:
// set up all the global variables
const toolboxWidth = document.querySelector('section.toolbox').offsetWidth
We've already defined our toolbox in our HTML with <section class="toolbox">, so we can use document.querySelector('section.toolbox') to select this particular HTML element. Then we can get its width with the offsetWidth property, which returns the width including any borders, padding, and scrollbars.
Our second global variable will be canvas, which will later point to the <canvas> element that we'll draw on. Let's set it to null for now.
let canvas = nullWe use let to declare our canvas variable here because we're going to change the value of canvas later. On the other hand, we use const to declare toolboxWidth because the width of our toolbox will always stay the same.
Our third global variable is bgColor. This holds a hex code that will be the initial background color of our canvas. I'll set it to be a light beige color, but feel free to use whatever color you want!
let bgColor = '#fbf8f3'✅ Code checkpoint 4
Variables with local scope vs. global scope
Each of our variables, toolboxWidth, canvas, and bgColor, are in the global scope. Let's break down the difference between variables with global and local scope before we move on.
Local variables
You can create variables with local scope by declaring them within some sort of code block, such as a function, if statement, or for loop. This locally scoped variable can only be accessed within the code block where you defined it.
Global variables
A global variable is a Javascript variable that has global scope, which means that you can read and modify the variable anywhere within your code. Declaring a variable outside of any function, if statement, or for loop means the variable will have global scope. Since we declared our toolboxWidth, canvas and bgColor variables globally, we can now access them anywhere in our Javascript code.
We'll continue to create several more global variables throughout this guide. We're going to declare them globally so we can access their values within our many Javascript functions. We'll also declare them at the very top of our app.js file, because it makes it easier to find them again by organizing them this way.
Writing our setup() function
Let's move on and write our setup() function. This is a special p5.js function that you should define in any p5.js application you create. It runs once at the start of your application, when it first loads in the browser, and this is typically where you'd initialize your <canvas> element and do any other tasks that only need to run once.
We'll create the setup() function underneath where we declared our global variables:
function setup() {

}
Creating the canvas
We'll initialize our <canvas> tag using the p5.js createCanvas() function inside the setup() function, and we'll save it in our global canvas variable so we can access it later:
// set up the canvas
canvas = createCanvas(windowWidth - toolboxWidth, windowHeight)
The createCanvas() function takes two parameters: the width and the height of the canvas element you want to create. We want our new <canvas> element to fill the browser except for the toolbox area, so we'll set its width to windowWidth - toolboxWidth, and we'll set its height to windowHeight so that it spans the full height of the browser window.
windowWidth and windowHeight are p5.js variables that conveniently give us the width and height of the browser window. The equivalent syntax in vanilla Javascript would be window.innerWidth and window.innerHeight.
What is the DOM?
We created a new object in the DOM when we created our <canvas> tag. DOM stands for Document Object Model, which is a fancy way of referring to the content of the current webpage. When you first load a webpage, the browser reads your HTML file (the “document”) and turns it into the DOM. The DOM contains all of our HTML elements, such as our <canvas> and <section> tags, as Javascript objects (hence the term Document Object Model).
The DOM lets us use Javascript to connect to the page and manipulate HTML elements, and we can interact with the DOM by using the document keyword in Javascript. We can select existing elements inside the DOM by using methods like document.querySelector() and document.querySelectorAll(), and we can also create new elements in the DOM via Javascript.
For example, in the step just above, we created a new <canvas> element in the DOM. Another example of interacting with the DOM is when we defined our toolboxWidth variable: we selected a specific <section> element from the DOM with document.querySelector('section.toolbox') and then grabbed that <section> tag's offsetWidth Javascript property.
Check out SuperHi's Javascript for Designers course to learn more about interacting with the DOM with Javascript.
Nesting the canvas within the canvas container
Now that we've created our <canvas>, let's place it inside our canvas container. We didn't specify where it should go when we first created our <canvas>, and so it was automatically appended to the bottom of the DOM as the last HTML element. However, we can also place it elsewhere in the DOM by specifying it's parent element.
First, we select our canvas container from the DOM using the p5.js select() function, then we can place our <canvas> element inside it by calling the p5.js method parent():
canvas.parent(select('section.canvas'))This select() function is the p5.js version of document.querySelector() in vanilla Javascript, and the p5.js library also provides a selectAll() function which is equivalent to document.querySelectorAll().
Setting the background color of the canvas
And finally, we'll set the canvas's background color by passing our global bgColor variable into the p5.js background() function:
background(bgColor)For now, the background color will be the color we already set in our bgColor variable, but we'll later add a color picker that lets the user change the background color dynamically.
✅ Code checkpoint 5
Writing our draw() function
Next, let's start writing our draw() function. You may recall from the first Painting with Code guide that the draw() function loops over and over again continuously, and this is what drives all the painting magic.
However, even though the draw() function runs all the time, we don't necessarily want to paint all the time! We want to check for two conditions before painting:
Condition #1: if the mouse button is pressed, by checking the p5.js boolean
mouseIsPressedCondition #2: if the mouse is hovering over the canvas container, by checking if
mouseX <= windowWidth - toolboxWidth
We'll draw on the canvas only if both of these conditions are met.
If you're wondering how the second condition — mouseX <= windowWidth - toolboxWidth — works, remember that the canvas container fills the entire left side of the browser window and the toolbox is on the right side. Also, the browser's coordinate system is relative to the top left corner of the browser window. We then know our mouse is hovering over the canvas container as long as the mouse's current X value, mouseX, is less than the toolbox's leftmost X value.
After we check those two conditions within our if statement, we can then paint with any of our paintbrush functions, such as pen():
function draw() {
  // check if mouse button is pressed and mouse is hovering over canvas container
  if (mouseIsPressed && mouseX <= windowWidth - toolboxWidth) {
    // draw on the canvas with the pen() function
    pen()
  }
}
However, we want to be able to use any and all of our paintbrushes, not just our pen()! We need some way to switch between our paintbrush functions in order to do that.
Let's create a new global variable called selectedTool, which holds the name of our selected paintbrush function as a string:
let selectedTool = 'pen'Then we can call that function with the window keyword:
function draw() {
	// check if mouse button is pressed and mouse is hovering over canvas container
  if (mouseIsPressed && mouseX <= windowWidth - toolboxWidth) {
    // draw on the canvas with the selected painting tool function
    window[selectedTool]()
  }
}
What is the window ?
window is a special Javascript keyword that holds a bunch of useful properties and information about our current browser window. One of the many pieces of information we can gather from the window is our global variables themselves, such as pen().
When we call window[selectedTool] in this case, we're grabbing the global variable with the name set by selectedTool, which we set above to the string, 'pen'. Then we can call the function itself by adding round brackets, as in window[selectedTool]().
This may seem like a very long way of writing pen(), but you can now swap out the value of the selectedTool variable with any of our other paintbrush function names, such as 'rainbowBeads', and the draw function will draw to the canvas with rainbowBeads() instead.
✅ Code checkpoint 6
Setting up a dropdown menu to select different paintbrushes
As our next step, we'll create a dropdown menu that updates the value of selectedTool. This allows us to switch between our many paintbrushes without having to manually update the code. This is also the first interactive element that we'll create in our toolbox.
First, try it out for yourself! Click on the dropdown menu under the Styles toolbox category to select a paintbrush. You can then paint with it by clicking and dragging on the canvas to the left:
Now, let's start building it. At the top of our app.js, in the section where we initialize our global variables, we'll add another global variable called brushSelector. We'll set it to null for now, but it will later point to our dropdown menu.
let brushSelector = nullNext, at the top of the setup() function, we'll call the p5.js createSelect() function to create a <select> element in the DOM. We'll save this to our brushSelector variable so we can refer to it again later.
function setup() {
	// create the brush selector as a <select> tag
	brushSelector = createSelect()

	// set up the canvas
  canvas = createCanvas(windowWidth - toolbox.offsetWidth, windowHeight)
  canvas.parent(select('section.canvas'))
  background(bgColor)
}
Now, you won't see your <select> element show up if you try to preview your painting application ... not yet! It's there, but it's hidden behind the <canvas> tag.
You can verify this yourself by using your browser's Inspector Tool on the <select> element. This is what I see when I use the Inspect tool with Chrome Developer Tools:
Notice the little blue rectangle in the top left corner of the browser? This is the silhouette of our <select> menu, hidden underneath the <canvas>.
If you look at the Elements panel on the right, you'll see a list of the HTML elements in the DOM, with the <select> element highlighted in blue towards the bottom of the list. It's at the bottom because p5.js functions like createSelect() will automatically append newly created elements there, just before the closing </body> tag.
To get our brushSelector menu to show up, we'll put it inside the Styles category in our toolbox. Right below where we called createSelect() inside of the setup() function, let's grab the Styles container from the DOM with the select() function:
// select the Styles category in the toolbox
const paintStyles = select('section.toolbox div.styles-tools')
Our Styles container is a <div> tag that's nested in our toolbox in our HTML. We're selecting this element from the DOM by passing a matching CSS selector into the select() function, then saving it in a variable called paintStyles.
Then, we'll place our menu inside of the paintStyles tag with the p5.js parent() function:
// put the brush selector dropdown menu inside of the Styles container
brushSelector.parent(paintStyles)
Now you'll see a dropdown menu show up on your p5.js canvas! 🎉 Hurrah!
✅ Code checkpoint 7
However, our brush selector menu is empty and there's nothing to select! Next, we'll need to add the options to our menu. Let's create a brushes array with all of our paintbrush function names as strings:
// make an array of all the paintbrush function names
const brushes = [
  'pen',
  'marker',
  'beads',
  'rainbowBeads',
  'wiggle',
  'toothpick',
  'fountainPen',
  'splatter',
  'sprayPaint',
]
Then we'll use a forEach() loop to pass each string from the brushes array into the option() method. This method adds an option to any <select> menu created with p5.js.
// add in the paintbrush function names as menu options
brushes.forEach(function (brush) {
    brushSelector.option(brush)
})
All of the options will now show up in the brushSelector menu.
Next, we'll set the initial value of our selectedTool global variable to be the same as the initial value of our brushSelector menu with the value() method:
// set initial value of the currently selected paintbrush
selectedTool = brushSelector.value()
Lastly, we need to update the selectedTool variable every time the user selects a different menu option. This ensures that our draw() function always uses the selected paintbrush function.
We can tell the browser to watch for whenever the user selects a different menu option by calling the changed() method on the brushSelector menu. The changed() method accepts a function as a parameter, which will be run whenever the menu selection changes. We'll pass in a function that updates the selectedTool based on the user's new menu selection:
// update the selected paintbrush if the user picks a different menu option
brushSelector.changed(function () {
  selectedTool = brushSelector.value()
})
And our brushSelector menu is now finally working!
✅ Code checkpoint 8
Re-organizing our code & adding more styling
We're going to build many more toolbox elements over the course of this guide, but we want to make sure our code stays concise and organized along the way. So let's refactor our Javascript code as our next step!
If you take a look at the setup() function, you may notice it's quite long. If we break the setup() function into multiple functions with specific purposes, our code will become more modular and also easier to read.
From a high level, we'll refactor setup() to use various functions like this:
setup()will call a function calledsetupToolbox()...then
setupToolbox()will set up the toolbox itself, by calling functions such assetupBrushSelector()...then
setupBrushSelector()will create ourbrushSelectormenu!
Here's a visual diagram that illustrates the timeline of the app.js script. This describes the flow of how these setup(), setupToolbox() and setupBrushSelector() functions work together to set up our painting application:
Creating a separate setupBrushSelector() function
Previously, we put our code for setting up our brushSelector menu within the setup() function directly. Let's clean this up by moving that code into a separate function called setupBrushSelector():
function setupBrushSelector() {
  // create the brush selector as a <select> tag
	brushSelector = createSelect()

  // select the Styles category in the toolbox
  const paintStyles = select('section.toolbox div.styles-tools')

  // put the brush selector dropdown menu inside of the Styles container
  brushSelector.parent(paintStyles)

  // make an array of all the paintbrush function names
  const brushes = [
    'pen',
    'marker',
    'beads',
    'rainbowBeads',
    'wiggle',
    'toothpick',
    'fountainPen',
    'splatter',
    'sprayPaint',
  ]

  // add in the paintbrush function names as menu options
  brushes.forEach(function (brush) {
      brushSelector.option(brush)
  })

  // set initial value of the currently selected paintbrush
  selectedTool = brushSelector.value()

  // update the selected paintbrush if the user picks a different menu option
  brushSelector.changed(function () {
    selectedTool = brushSelector.value()
  })
}
Now that we've moved the code into a separate setupBrushSelector() function, let's call that new function inside of our setup() function:
function setup() {
	setupToolbox()

	// set up the canvas
	canvas = createCanvas(windowWidth - toolboxWidth, windowHeight)
	canvas.parent(select('section.canvas'))
	background(bgColor)
}
Creating a separate setupToolbox() function
The setupToolbox() function is where we call our setup functions for creating toolbox elements, like our brushSelector menu. Let's create this new setupToolbox() function, and inside it we'll call setupBrushSelector():
function setupToolbox() {
  setupBrushSelector()
}
The p5.js library gives us many useful functions for creating interactive controls like buttons, sliders, and dropdown menus, and we're going to make many more of these as toolbox elements in this guide. Moving forward, we're going to create a separate setup function for each individual toolbox element, just like setupBrushSelector(). We'll call these functions inside the setupToolbox() function.
Passing the parent tag into our setup functions
Each of our painting app's input elements fits inside one of our four toolbox containers: Canvas, Painting Tools, Styles and Background. As a general pattern, we'll select them from the DOM with the select() function and then set them as parent tags with the parent() function, just as we did with our setupBrushSelector() function and this bit of code:
// select the Styles category in the toolbox
const paintStyles = select('section.toolbox div.styles-tools')

// put the brush selector dropdown menu inside of the Styles container
brushSelector.parent(paintStyles)
To avoid repeating ourselves as we continue writing our app.js code, we'll select() the parent containers within our setupToolbox() function instead. For example, if we want the paintStyles toolbox container to be the parent of our brushSelector, we can change our setupToolbox() function to this instead:
function setupToolbox() {
  // set up paint style tools in the Styles category
  const paintStyles = select('section.toolbox div.styles-tools')
  setupBrushSelector(paintStyles)
}
Here, we're passing in paintStyles into our setupBrushSelector() function as a parameter.
We can then modify our setupBrushSelector() function to accept a parentTag parameter, which we'll use to set the brushSelector menu's parent tag with the parent() function:
function setupBrushSelector(parentTag) {
  // create the brush selector as a <select> tag
	brushSelector = createSelect()

  // put the brush selector dropdown menu inside of its toolbox category
  brushSelector.parent(parentTag)

  // make an array of all the paintbrush function names
  const brushes = [
    'pen',
    'marker',
    'beads',
    'rainbowBeads',
    'wiggle',
    'toothpick',
    'fountainPen',
    'splatter',
    'sprayPaint',
  ]

  // add in the paintbrush function names as menu options
  brushes.forEach(function (brush) {
      brushSelector.option(brush)
  })

  // set initial value of the currently selected paintbrush
  selectedTool = brushSelector.value()

  // update the selected paintbrush if the user picks a different menu option
  brushSelector.changed(function () {
    selectedTool = brushSelector.value()
  })
}
Re-organizing our setupToolbox() and setupBrushSelector() functions this way makes our code more modular and easier to read. If we had multiple toolbox elements inside the Styles category, then we'd only need to select() the Styles category container once from the DOM, as the paintStyles variable. We can then pass paintStyles into multiple functions, such as setupBrushSelector() , and we don't have to select the same parent element multiple times.
✅ Code checkpoint 9
Labelling our inputs with a <label> tag
Rather than setting the parent container of the brushSelector menu directly inside the setupBrushSelector() menu, we can instead take this a step further. You may notice that our menu doesn't have any label or text that describes it's purpose to the user, so we'll give the menu a text label to make it more explicit.
To make it's label, we'll nest the brushSelector inside a <label> tag. Since we're going to make more form elements in this guide, which also need labels, we'll make a helper function for this, and we'll call it inside our setupBrushSelector() function.
Our helper function will be called makeLabel(), and will take 3 parameters:
tag: the element we want to labelparentTag: the container that holds the labeltext: the label's text
Let's create the makeLabel() function with it's 3 parameters:
function makeLabel(tag, parentTag, text) {

}
Inside the makeLabel() function, we'll first create the label with the p5.js createElement() function, which allows you to create any HTML element, and we'll pass in the string 'label' as the first parameter, to make a <label> tag. The createElement() function accepts a second parameter optionally, which is the HTML content to go inside the new element. We'll fill our new <label> with the label's text:
const label = createElement('label', text)Next, we'll place the new <label> tag inside the parentTag, and the tag will go inside the label:
label.parent(parentTag)
tag.parent(label)
Calling the parent() function on our label, tag and parentTag HTML elements will nest them so that the tag is inside the label, which is instead the parentTag.
And we've now made our <label> helper function! We'll use this to label more toolbox elements later in the guide:
function makeLabel(tag, parentTag, text) {
  const label = createElement('label', text)
  label.parent(parentTag)
  tag.parent(label)
}
To make a label for our brushSelector menu, all we'd need to do now is to delete this bit of code from the setupBrushSelector() function:
// put the brush selector dropdown menu inside of its toolbox category
brushSelector.parent(parentTag)
And replace it with the makeLabel() helper function, passing in the appropriate parameters:
// make a label for the menu
makeLabel(brushSelector, parentTag, 'Paintbrush style')
✅ Code checkpoint 10
Updating our CSS
We've added one interactive toolbox element so far, our brushSelector menu, along with its label. Let's style them up, along with the other inputs that we'll make during the rest of this guide. You can add the below CSS code to the bottom of your styles.css file.
Styling the labels
First we'll style our labels with some margins. By default, <label> tags are inline elements, so make them stack on top of each other we'll instead change them to block elements.
label {
	display: block;
	margin-bottom: 8px;
	font-size: 14px;
}

label > * {
	margin-top: 8px;
}
Styling the inputs
Browsers will style <input>, <button> and <select> elements using their own defaults. So even though we've already set our font-family and font-size properties on the <body> tag, we also have to explicitly add these font styles to these input elements. We'll also style them by defining their size, margins, and borders, and to change their background color on hover.
input, button, select {
	font-size: 14px;
	font-family: Nunito, sans-serif;
	line-height: 1;

	width: 100%;
	height: 32px;
	margin-bottom: 12px;

	border: 1px solid #545454;
	border-radius: 4px;
	background-color: #f0f0f0;
}

input:hover, button:hover, select:hover {
	background-color: #dfdfdf;
}

input[type="range"] {
	height: 16px;
}
✅ Code checkpoint 11
Taking a step back
Whew, that was a lot of refactoring! While it may seem unnecessary right now, since we haven't written that much Javascript code, this re-organizing will be very helpful as we continue building the rest of our painting application. Before we move on, let's recap what we did and why.
A quick recap
So far, we've done the following:
Defined the underlying structure of our painting application in our HTML
Styled the layout in CSS
Compiled all of our paintbrush functions from the first Painting with Code guide into
paintbrushes.jsCreated
setup()anddraw()functions, the two key components of any p5.js application, in ourapp.jsfileBuilt a dropdown menu that allows the user to select different paintbrushes with our
setupBrushSelector()functionLaid the foundation for how we'll organize our code going forward by creating...
A
makeLabel()helper function to create a label tag for any elementA
setupToolbox()function to set up our toolbox elements
Up next...
We're going to follow this modular pattern of breaking our code up into smaller functions over the course of the rest of this guide. Up next, we're going to create some buttons, sliders, and color pickers that will allow you to customize how you paint on the canvas.
Creating buttons
Buttons are useful for triggering something to happen with a simple click. Let's make two buttons: one for saving the canvas as an image file, and the other for clearing the canvas to start a new painting.
Helper function for setting up a button
Just like we created our makeLabel() helper function, we'll create another helper function called setupButton(). Since we are making two buttons, using a helper function will help us avoid repeating the same code, and also makes it easier to make more buttons going forward.
Since this setupButton() helper function is related to setting up the toolbox, we'll put it inside of our toolbox.js file. It will take in three parameters:
text— the text that will label the buttonparentTag— the container that holds the buttononClick— the function that get triggered when the button is clicked
function setupButton(text, parentTag, onClick) {

}
Inside of our setupButton() function, we'll create a <button> element in the DOM with the p5.js createButton() function. This function takes in one parameter, which is a string that will be the button's label. We'll pass in text as its label.
const button = createButton(text)Then we'll put our new button inside of its parentTag with the parent() function:
button.parent(parentTag)Whenever the user clicks on the button, we want something to happen in response. We can do this by passing in our onClick function into the mousePressed() method, which we can call on our new button:
button.mousePressed(onClick)This tells the browser to watch out for when the user clicks on the button. When the user clicks on the button, it triggers the onClick function that we pass into mousePressed().
Later on, we might want to keep track of the buttons we create with this function. So, as the last line of code in this function, we'll return our button:
return button✅ Code checkpoint 12
Creating a Save button to save the canvas as a JPG image file
Now that we've set up our setupButton() helper function, it's super easy for us to create a new <button> element in our toolbox with just a few steps! The first button we'll make is a Save button, which allows the user to save the current painting canvas as an image file.
Creating a saveFile() function that saves the canvas as an image file
The first step is to define what should happen when the user clicks on the Save button. Inside of the app.js file, we'll create a function called saveFile() which saves the current canvas an an image file.
We can use the p5.js saveCanvas() function which takes in two parameters:
The first parameter is the file name as a string.
The second parameter sets the file extension, and can be one of two options: either the string
'png'or'jpg'.
function saveFile() {
  saveCanvas('painting', 'png')
}
If we set the file name to 'painting' and the file extension to 'png', then when we click on the Save button, the canvas will be saved as a PNG file named 'painting.png'. Feel free to choose whichever file name and extension you'd like.
✅ Code checkpoint 13
Creating the save button with the setupSaveButton() helper function
Just like we made a setupBrushSelector() function set up the brushSelector menu, we'll create a setupSaveButton() function to create our Save button. We already have our helper function setupButton(), as well as our saveFile() function, so this step will be super short.
Our setupSaveButton() function will take in a parentTag as its only parameter. And it will use that parentTag to create a new button with the setupButton() helper function:
function setupSaveButton(parentTag) {
  setupButton('Save', parentTag, saveFile)
}
You may recall that the setupButton() function takes in 3 parameters: the text that will label the button, the parentTag that holds the button, and the onClick function that triggers when the button is clicked.
So, to set up our Save button, we'll pass 3 parameters into setupButton():
'Save'will be the button's text labelparentTagwhich we passed in as a parametersaveFile, which is the name of the function that we want to trigger on button click. We already defined this in the previous step. Notice how we only include the name of the function here, without any parentheses – adding parentheses would tell the browser to run the function and pass in its return value, rather than passing in the function itself.
✅ Code checkpoint 14
Updating the setup() function to create our Save button
And finally, within our setupToolbox() function, we can call our setupSaveButton() function.
We want this button to go inside of our Canvas container within our toolbox. So, we'll select the Canvas container with the select() function and save it in a variable called canvasTools:
// set up canvas tools in the Canvas category
const canvasTools = select('section.toolbox div.canvas-tools')
Then we'll pass canvasTools as the parent container for our Save button:
setupSaveButton(canvasTools)Now, you should see your Save button show up in your toolbox. Try it out for yourself here:
✅ Code checkpoint 15
Creating a Reset button to clear the canvas
Let's also create a Reset button that allows you to clear and reset the canvas so you can start a brand new painting. We'll follow the same steps we used to create our Save button just now.
Creating a function that runs when you press the Reset button
First, let's define what should happen when the user presses the Reset button.
We want to do two things: resize the canvas to fill the canvas container, and set its background color. Does this sound familiar? If you take a look at what you already wrote at the bottom of the setup() function, you'll see that we followed the same pattern when we first created the canvas here:
function setup() {
  setupToolbox()

  // set up the canvas
  canvas = createCanvas(windowWidth - toolboxWidth, windowHeight)
  canvas.parent(select('section.canvas'))
  background(bgColor)
}
We'll follow a similar pattern to reset the canvas. Let's create our resetCanvas() function first:
function resetCanvas() {

}
Then inside of this resetCanvas() function, let's first resize the canvas to fill the whole canvas container that sits to the left of the toolbox. We'll use the p5.js function resizeCanvas() here, and pass in the canvas container's width as windowWidth - toolboxWidth and its height as windowHeight. To refresh your memory on why we resize the canvas with these dimensions, scroll up and review the section titled Writing our setup() function.
// resize canvas to fill the painting area
resizeCanvas(windowWidth - toolboxWidth, windowHeight)
Now that we've resized the canvas with its new dimensions, all we need to do next is refill the canvas with the background color:
// fill canvas with background color
background(bgColor)
✅ Code checkpoint 16
Defining up the setupResetButton() function
Next, we'll create a setupResetButton() function inside of our toolbox.js file, the same way we created our setupSaveButton() function:
function setupResetButton(parentTag) {
  setupButton('Reset', parentTag, resetCanvas)
}
Updating the setupToolbox() function to create our Reset button
Now we can call setupResetButton() within our setupToolbox() function. To make it go inside of our Canvas category in the toolbox, we can pass in canvasTools as the parameter.
function setupToolbox() {
  // set up paint style tools in the Styles category
  const paintStyles = select('section.toolbox div.styles-tools')
  setupBrushSelector(paintStyles)

  // set up canvas tools in the Canvas category
  const canvasTools = select('section.toolbox div.canvas-tools')
  setupSaveButton(canvasTools)
  setupResetButton(canvasTools)
}
And there you have it! Two buttons for saving and resetting the canvas. Here's the current state of our painting application with the Save and Reset buttons:
✅ Code checkpoint 17
How to make a button: a general pattern
As a quick recap, let's break down the general steps you'd take to create a button:
Create a function that should run whenever the button is clicked, such as
saveFile()andresetCanvas()Create a helper function that sets up the button, such as
setupSaveButton()andsetupResetButton()Call that helper setup function within your
setupToolbox()function, and pass in its parent element from the DOM, such ascanvasToolsorpaintingTools
You can use this same pattern to create any new button going forward, beyond just a Save and Reset button! For example, currently our Save button only saves the canvas as a PNG image file. Alternatively, you could create two separate buttons so that you can save the canvas as either a PNG or a JPG image file. Or, you could even use a dropdown menu instead, so that the user can save the canvas a multitude of different file types.
As a sneak peek, we'll create one more button later in this guide: a Rainbow button that lets you paint in rainbow colors! 🌈
✅ Code checkpoint 18
Creating color pickers
Beyond buttons, we can also create color pickers, which are modals that let you choose a single color. We'll create two color pickers: one that lets you change the canvas background color and the other the paint color. As a bonus, we'll create a button that lets you paint with rainbow!
The color picker modal itself is already built into your browser, so all we're doing here is creating the built-in HTML element and letting the browser do the rest. If you click on the color picker button to open up the color picker menu, you'll also notice there's an eyedropper icon – this lets you pick a color from anywhere on the browser window, including your canvas!
Helper function for setting up a color picker
First, we'll start by making a helper function setupColorPicker() for creating a color picker. It will take in 4 parameters:
initialColor– the initial value of the color pickerparentTag– the container that holds the color pickertext– the text that will label the color pickeronChange– the function that triggers when the user picks a different color
In our app.js file, we'll create our setupColorPicker() function with those 4 parameters:
function setupColorPicker(initialColor, parentTag, text, onChange) {

}
Inside of our setupColorPicker() function, we'll call the createColorPicker() p5.js function which creates a new color picker element in the DOM. This function takes in one parameter, the initial color value, and so we'll pass in initialColor here.
const colorPicker = createColorPicker(initialColor)In terms of HTML, this creates an <input> tag with the type attribute value of 'color' in the DOM. We'll save our new color picker in the colorPicker variable.
Next, we'll call our helper function makeLabel() and pass in our colorPicker along with the parentTag and text as parameters:
makeLabel(colorPicker, parentTag, text)Whenever the user changes the color value of the color picker, we want something to happen. We'll set this by calling the changed() p5.js function on our colorPicker, and passing in the onChange function:
colorPicker.changed(onChange)And finally we'll return our colorPicker at the end of our setupColorPicker() function:
return colorPickerCreating a background color picker
Now that we've put together our setupColorPicker() helper function, let's use it! We'll create a background color picker first by defining our setupBgColorPicker() function which takes in its parentTag as one parameter:
function setupBgColorPicker(parentTag) {

}
Then inside setupBgColorPicker(), we'll call our setupColorPicker() helper function to create our background color picker:
const bgColorPicker = setupColorPicker(bgColor, parentTag, 'Background color', function () {
  bgColor = bgColorPicker.color()
  resetCanvas()
})
We're passing in the following values into setupColorPicker() as the parameters:
bgColor– the initial color picker colorWe already have
bgColoras a global variable that holds the initial background color of the canvas, which we first set inside of oursetup()function. We passbgColorintosetupColorPicker()as the color picker's initial value to ensure that the background color picker in our toolbox accurately reflects the actual initial background color of the canvas. If we don't do this, then the color picker element will be filled in with white by default.
parentTag– the parent container that will hold our color picker'Background color'– the text that labels the color pickerThis function:
function () {
  bgColor = bgColorPicker.color()
  resetCanvas()
}
This function updates the global variable bgColor to the new color that the user selected from the color picker. Then, it resets the canvas by using our resetCanvas() function.
✅ Code checkpoint 19
Updating the setupToolbox() function to set up the background color picker
Now we can call setupBgColorPicker() within our setupToolbox() function. We'll put our background color picker inside of the Background category of our toolbox. We'll select() the Background container and save it in the backgroundStyles variable, which we'll pass into setupBgColorPicker() as the parent tag:
function setupToolbox() {
  // set up paint style tools in the Styles category
  const paintStyles = select('section.toolbox div.styles-tools')
  setupBrushSelector(paintStyles)

  // set up canvas tools in the Canvas category
  const canvasTools = select('section.toolbox div.canvas-tools')
  setupSaveButton(canvasTools)
  setupResetButton(canvasTools)

	// set up background style tools Background category
  const backgroundStyles = select('section.toolbox div.background-tools')
  setupBgColorPicker(backgroundStyles)
}
And voilà! Now you'll have a working background color picker in your toolbox. Check it out here:
✅ Code checkpoint 20
Creating a paint color picker
Let's add another color picker for changing the paint color! The process of implementing this will be a bit more involved than the background color because we also have to change all of our individual paintbrush functions as well.
Setting up our paint color picker with setupPaintColorPicker()
First, let's create the new setupPaintColorPicker() function and pass in its parentTag as a parameter:
function setupPaintColorPicker(parentTag) {

}
Then inside of this new function, we can call our setupColorPicker() helper function:
const paintColorPicker = setupColorPicker(paintColor, parentTag, 'Paint color', function () {
  paintColor = paintColorPicker.color()
})
We're passing in the following values into setupColorPicker() as the parameters:
paintColor– the initial color picker color, which is one of our global variablesparentTag– the parent container that will hold our color picker'Paint color'– the text that labels the color pickerThis function that updates the global variable
paintColorto the new paint color that the user selected in the paint color picker:
function () {
  paintColor = paintColorPicker.color()
}
As the last line of code in our setupPaintColorPicker() function, let's re-assign the paintColor to be equal to the value of our paintColorPicker. We can get its value using the color() function, which returns the color as a p5.Color object.
paintColor = paintColorPicker.color()Why bother setting the color as a p5.js Color object, when it already works? As a sneak peek, this makes it easier for us to later create a slider that lets the user change the paint color opacity.
Updating the setupToolbox() function to set up the paint color picker
Now we can call setupPaintColorPicker() within our setupToolbox() function. We'll put our paint color picker inside of the Styles category of our toolbox:
function setupToolbox() {
  // set up paint style tools in the Styles category
  const paintStyles = select('section.toolbox div.styles-tools')
  setupBrushSelector(paintStyles)
	setupPaintColorPicker(paintStyles)

  // set up canvas tools in the Canvas category
  const canvasTools = select('section.toolbox div.canvas-tools')
  setupSaveButton(canvasTools)
  setupResetButton(canvasTools)

	// set up background style tools Background category
  const backgroundStyles = select('section.toolbox div.background-tools')
  setupBgColorPicker(backgroundStyles)
}
✅ Code checkpoint 21
Updating all of our paintbrush functions in paintbrushes.js
If you take a look at all of our paintbrush functions in the paintbrushes.js file, you'll see that we set the color of each paintbrush at the top of its function. For example, here's our marker() paintbrush function:
function marker() {
	// set the color and brush style
  fill(255, 200, 103, 40)
  noStroke()

	// draw a circle at the current mouse point, with diameter of 50 pixels
  circle(mouseX, mouseY, 50)
}
In this marker() function, we set the fill color by passing 4 values into the fill() function to define our color in the RGBA color mode.
We'll need to change all of these paintbrush functions if we want to set the color with the paint color picker's value instead. Let's start by deleting all of our stroke() and fill() function calls in each of our paintbrush functions.
For example, our marker() paintbrush function will now look like this:
function marker() {
	// set the brush style
  noStroke()

	// draw a circle at the current mouse point, with diameter of 50 pixels
  circle(mouseX, mouseY, 50)
}
As another example, let's modify our beads() paintbrush function. Right now, it looks like this:
function beads() {
  // set the color and brush style
  fill(185, 83, 213, 180)
  noStroke()

  // find the distance between the current and previous mouse points
  const distance = dist(mouseX, mouseY, pmouseX, pmouseY)

  // find the midpoint between the current and previous mouse points
  const midX = (mouseX + pmouseX) / 2
  const midY = (mouseY + pmouseY) / 2

  // draw a circle at the midpoint, with distance as its diameter
  circle(midX, midY, distance)
}
We'll modify it by deleting the call to fill() because we are going to set the fill color elsewhere instead. So, our beads() function will now become the following:
function beads() {
  // set the brush style
  noStroke()

  // find the distance between the current and previous mouse points
  const distance = dist(mouseX, mouseY, pmouseX, pmouseY)

  // find the midpoint between the current and previous mouse points
  const midX = (mouseX + pmouseX) / 2
  const midY = (mouseY + pmouseY) / 2

  // draw a circle at the midpoint, with distance as its diameter
  circle(midX, midY, distance)
}
In the below code checkpoint, you'll find the new paintbrushes.js file with all of the modified paintbrush functions.
✅ Code checkpoint 22
Setting the paint color in setPaintColor()
Instead of directly setting the paint color within each individual paintbrush function, we'll create another helper function called setPaintColor(). This makes our code in paintbrushes.js far less repetitive.
First, let's create another global variable paintColor. We'll declare it at the top of our app.js file in the same place where we created all of our other globals:
let paintColor = '#000000'We'll set the initial paint color to the hex code '#000000', which is black. However, you can use whatever color you'd like as the initial color.
Then in our app.js file, we can create a new function that sets the paint color called setPaintColor():
function setPaintColor() {
	// set the color of the stroke and fill
  stroke(paintColor)
  fill(paintColor)
}
Updating the draw() function
Finally, we'll call this setPaintColor() function inside of the if statement in draw():
function draw() {
	// check if mouse button is pressed and mouse is hovering over canvas container
  if (mouseIsPressed && mouseX <= windowWidth - toolboxWidth) {
    // set the paint color
    setPaintColor()

    // draw on the canvas with the selected painting tool function
    window[selectedTool]()
  }
}
And now your paint color picker should be fully working! Try it out below:
✅ Code checkpoint 23
Painting across the rainbow 🌈
Beyond painting with just a single color, what if we wanted to paint in rainbow? Let's create another button that lets us transition the paint color across the color spectrum over time.
For context, we already created a rainbow paintbrush in the first Painting with Code guide called rainbowBeads() with this bit of code at the top of the function:
function rainbowBeads() {
	// find the hue, which is a number from 0 to 360
	const hue = (frameCount * 2) % 360

// set the color in HSBA color mode using the hue
	const hsbaColor = color(`hsba(${hue}, 100%, 100%, 0.6)`)
This bit of code finds an hsbaColor in the HSBA colorspace using the color() function and the hue. This hsbaColor maps to a different color across the rainbow every time the draw() function gets called, because its hue is based on the frameCount. For an in-depth explanation on how this works, check out the first Painting with Code guide.
Modifying setPaintColor()
To make this rainbow color effect work on all of our paintbrushes, let's start by creating a global variable ifRainbowColor and set it initially to false:
let ifRainbowColor = falseWe'll put this global variable at the top of the app.js file along with all of our other globals.
Then we'll modify our setPaintColor() function by adding an if statement that checks ifRainbowColor:
If
ifRainbowColoris true, we'll set the color of thestroke()andfill()to the rainbowhsbaColor.If
ifRainbowColoris false, we'll set the color of thestroke()andfill()to the normalpaintColor.
function setPaintColor() {
  if (ifRainbowColor) {
    // find the hue, which is a number from 0 to 360
    const hue = (frameCount * 2) % 360

    // set the color
    const hsbaColor = color(`hsba(${hue}, 100%, 100%, 0.6)`)
    stroke(hsbaColor)
    fill(hsbaColor)

  } else {
    stroke(paintColor)
    fill(paintColor)
  }
}
Right now, setPaintColor() redundantly calls stroke() and fill() twice. To make this function less repetitive, we can reorganize it like this instead:
function setPaintColor() {
  // set color to either rainbow or normal paint color
	let newColor
  if (ifRainbowColor) {
    const hue = (frameCount * 2) % 360
    newColor = color(`hsba(${hue}, 100%, 100%, 0.6)`)
  } else {
		newColor = paintColor
  }

  // set the stroke and fill color
  stroke(newColor)
  fill(newColor)
}
Creating a Rainbow Paint Color button with setupRainbowColorButton()
Next, let's create a button setup function called setupRainbowColorButton(), which takes in a parentTag as a parameter:
function setupRainbowColorButton(parentTag) {

}
Inside of our new function, we'll call our helper function setupButton() to create a button that lets the user toggle whether or not to use the rainbow paint color:
setupButton('Rainbow color 🌈', parentTag, function () {
  ifRainbowColor = !ifRainbowColor
})
When the user clicks on the button, our global variable ifRainbowColor will get set to the opposite of its current value, !ifRainbowColor, which uses the logical NOT operator !. So, if ifRainbowColor is false, then !ifRainbowColor would be true, and vice versa. Then, the setPaintColor() function would set the paint color to rainbow or a single color depending on the value of ifRainbowColor.
Modifying setupPaintColorPicker()
If the user chooses a different color on the paint color picker, they should be able to paint with their new chosen color instead of rainbow. So, let's modify our setupPaintColorPicker() function by changing ifRainbowColor to false whenever the user changes the paint color picker's value:
function setupPaintColorPicker(parentTag) {
  const paintColorPicker = setupColorPicker(paintColor, parentTag, 'Paint color', function () {
    paintColor = paintColorPicker.color()
    ifRainbowColor = false
  })
  paintColor = paintColorPicker.color()
}
✅ Code checkpoint 24
Updating setupToolbox() to set up our new Rainbow Color button
Now that we have our setupRainbowColorButton() function, we can call it inside of our setupToolbox() function. To place it inside of our Styles category, we'll pass in paintStyles as its parent:
function setupToolbox() {
  // set up paint style tools in the Styles category
  const paintStyles = select('section.toolbox div.styles-tools')
  setupBrushSelector(paintStyles)
  setupPaintColorPicker(paintStyles)
  setupRainbowColorButton(paintStyles)

  // set up canvas tools in the Canvas category
  const canvasTools = select('section.toolbox div.canvas-tools')
  setupSaveButton(canvasTools)
  setupResetButton(canvasTools)

  // set up background style tools Background category
  const backgroundStyles = select('section.toolbox div.background-tools')
  setupBgColorPicker(backgroundStyles)
}
Deleting our rainbowBeads() paintbrush function
And finally, we'll clean up one last bit of code. Having a rainbowBeads() paintbrush function is redundant when we already have a beads() function and a new Rainbow Color button. So, we can delete the rainbowBeads() function entirely from our paintbrushes.js file. We can also delete it from the list of paintbrush options in our dropdown menu, which you can find in the setupBrushSelector() function.
And now our rainbow color button is fully finished!
✅ Code checkpoint 25
Creating sliders
Let's move on from color pickers to another type of interactive element: sliders! Sliders allow you to choose a number between a range of numbers.
We'll create two sliders for adjusting the brush size and the opacity of the paintbrush. The process will be very similar to how we created our buttons.
Helper function for setting up a slider
Let's write a helper function setupSlider() that accepts the following 7 parameters:
min– the minimum of the range of slider valuesmax– the maximum of the range of slider valuesinitialValue– the initial value of the sliderstep– the step size for moving up and down the range of slider valuestext– the text that will label the sliderparentTag– the container that holds the slideronInput– the function that triggers when the user inputs a new slider value
First we'll create our setupSlider() function with all of its parameters:
// helper function that sets up a slider
function setupSlider(min, max, initialValue, step, text, parentTag, onInput) {

}
Inside of our setupSlider() function, we'll create a new slider element in the DOM using the p5.js createSlider() function. We'll pass in min, max, initialValue and step as parameters, and save our new slider in a variable called slider:
const slider = createSlider(min, max, initialValue, step)Next, we'll call our makeLabel() helper function so that our new slider has a label. We'll pass in slider, parentTag, and text as the parameters:
makeLabel(slider, parentTag, text)Then we'll tell the browser to watch out for whenever the user changes the slider value by calling the p5.js input() function on our slider. When that happens, it will trigger the onInput function:
slider.input(onInput)And finally, we'll return the slider at the very end of our setupSlider() function, just in case we want to keep track of it later:
return sliderHere's our final setupSlider() helper function:
function setupSlider(min, max, initialValue, step, text, parentTag, onInput) {
  const slider = createSlider(min, max, initialValue, step)
  makeLabel(slider, parentTag, text)
  slider.input(onInput)
  return slider
}
✅ Code checkpoint 26
Creating an opacity slider for the paint color
Now, using our new setupSlider() helper function, we can easily create a new slider for changing the paint color opacity.
Whenever the user interacts with the opacity slider, we want the slider value to update the opacity of our paint color. We'll make this happen by creating a global variable opacity, which our slider will update. Then, we'll modify our setPaintColor() function so that it sets the paint color's Alpha value based on the opacity.
Creating a global variable for the opacity
First, let's create a new global variable opacity. We'll start it at 220 as the initial value.
let opacity = 220Our opacity is a number that can range between 0 to 255, where 0 is completely transparent and 255 is completely opaque. Generally, most color modes in p5.js operate between this range of 0 to 255, and you can learn more about this by checking out the p5.js Color Guide.
Modifying setPaintColor() to set the paint color opacity
Next, we can modify the our setPaintColor() function to set the opacity of the paintColor by using the setAlpha() function. This function sets the Alpha value, or opacity, of p5.Color objects such as our paintColor and hsbaColor.
Right before we set the paint color of stroke() and fill(), let's set the newColor's Alpha value based on our global variable opacity:
newColor.setAlpha(opacity)Creating our opacity slider with setupOpacitySlider()
We can now create a new function setupOpacitySlider() that sets up our opacity slider by calling our setupSlider() helper function:
function setupOpacitySlider(parentTag) {
  const opacitySlider = setupSlider(0, 255, opacity, 1, 'Opacity', parentTag, function () {
    opacity = opacitySlider.value()
  })
}
We're passing in the following seven values into setupOpacitySlider() as the parameters:
0– the minimum of the range of slider values255– the maximum of the range of slider valuesopacity– the initial opacity value of the slider1– the step size for moving up and down the range of opacity values'Opacity'– the text that will label the sliderparentTag– the container that holds the sliderThis function that updates the global variable
opacityto the new opacity value that the user selected in the slider:
function () {
    opacity = opacitySlider.value()
})
Setting up our opacity slider in setupToolbox()
And finally, let's call our setupOpacitySlider() function in setupToolbox(). We'll pass in paintStyles as its parent element:
function setupToolbox() {
  // set up paint style tools in the Styles category
  const paintStyles = select('section.toolbox div.styles-tools')
  setupBrushSelector(paintStyles)
  setupPaintColorPicker(paintStyles)
  setupRainbowColorButton(paintStyles)
  setupOpacitySlider(paintStyles)

  // set up canvas tools in the Canvas category
  const canvasTools = select('section.toolbox div.canvas-tools')
  setupSaveButton(canvasTools)
  setupResetButton(canvasTools)

  // set up background style tools Background category
  const backgroundStyles = select('section.toolbox div.background-tools')
  setupBgColorPicker(backgroundStyles)
}
Ta da! 🎉 Now we have an opacity slider in our toolbox!
✅ Code checkpoint 27
Creating a brush size slider
For our last toolbox element, let's create one more slider for changing the brush size!
Creating a global variable for the brush size
First, let's create a new global variable brushSize at the top of our app.js file. We'll start it at 1 as the initial value but it will later get updated by the brush size slider.
let brushSize = 1Setting up our brush size slider with setupBrushSizeSlider()
Next, let's make a new setupBrushSizeSlider() function that takes in a parentTag as a parameter:
function setupBrushSizeSlider(parentTag) {

}
Then inside of setupBrushSizeSlider(), we'll call setupSlider():
const brushSizeSlider = setupSlider(1, 16, brushSize, 0.1, 'Brush size', parentTag, function () {
    brushSize = brushSizeSlider.value()
})
We're passing in 7 parameters here:
1– the minimum value of the slider's range16– the maximum value of the slider's rangebrushSize– the initial value of the slider0.1– the step size value of moving up and down the range of brush size values'Brush size'– the slider's label textparentTag– the parent element of the sliderThis function that updates the global variable
brushSizeto the new brush size value that the user selected in the slider:
function () {
    brushSize = brushSizeSlider.value()
}
✅ Code checkpoint 28
Refactoring our paintbrush functions in paintbrushes.js
Our next step is to modify the way we paint on the canvas so that the size of our paint strokes depends on brushSize. Right now, the size of our paint strokes is defined within each of our paintbrush functions, which all work a little bit differently.
Let's look at the code of each paintbrush function to figure out how to incorporate the brushSize. For example, a paintbrush function like our pen() draws a line on the canvas with the line() function. We can modify the thickness of our pen() function's line by passing brushSize straight into the strokeWeight() function:
function pen() {
	// set the brush style
	strokeWeight(brushSize)

	// draw a line from current mouse point to previous mouse point
  line(mouseX, mouseY, pmouseX, pmouseY)
}
Similarly, the wiggle(), fountainPen(), and hatching() paintbrush functions also draw lines on the canvas using line(). So, we can modify these paintbrush functions the same exact way we changed pen(), by passing brushSize into strokeWeight() as well.
On the other hand, paintbrush functions like our marker() and beads() wouldn't get affected by the strokeWeight() function at all. This is because these two functions draw circles to the canvas with the circle() function, rather than drawing lines.
We'll modify our marker() function by making the circle diameter depend on the brushSize:
function marker() {
	// set the brush style
  noStroke()

	// draw a circle at the current mouse point
  circle(mouseX, mouseY, brushSize * 20)
}
We pass brushSize in as the third parameter to the circle() function here, because the third parameter maps to the circle diameter. We also multiply brushSize by 20 to make the circles even larger. You can play around with different multiplier values to tweak your own version of the marker().
However, unlike marker(), we will not make any modifications to our beads() paintbrush function. Our beads() function draws circles to the canvas based on the distance between the current and previous mouse points. If we were to make the diameters of the circles based on the brushSize, just like we did with our marker() function, then the string-of-beads effect would be lost. So, we're actually going to leave this beads() function as it is, and it won't change according to the brushSize.
Our splatter() and sprayPaint() functions both paint points on the canvas using the point() function, and we can change the size of these points using the strokeWeight() function. So, we'll pass brushSize into strokeWeight() in both of these functions and we'll also tweak the brushSize value with a multiplier as well.
We'll modify the splatter() paintbrush by passing brushSize * 2 into strokeWeight(). Multiplying by two makes the points a bit larger in size, but you can play around with different values yourself to find a different splatter texture.
function splatter() {
  // set the brush style
  strokeWeight(brushSize * 2)

  // set the number of times we lerp the point in the for loop
  const lerps = 8

	// repeat the point with lerping
  for (let i = 0; i < lerps; i++) {

		// find lerped x and y coordinates of the point
    const x = lerp(mouseX, pmouseX, i / lerps + lerps)
    const y = lerp(mouseY, pmouseY, i / lerps + lerps)

		// draw a point
    point(x, y)
  }
}
We'll modify the sprayPaint() paintbrush by passing brushSize * 0.1 into strokeWeight(). By multiplying by 0.1, we're making the points much smaller, which gives us a finer spray paint texture.
function sprayPaint() {
	// set the brush style
  strokeWeight(brushSize * 0.1)

	// find the speed of the mouse movement
  const speed = abs(mouseX - pmouseX) + abs(mouseY - pmouseY)

	// set minimum radius and spray density of spraypaint brush
	const minRadius = 10
	const sprayDensity = 80

  // find radius of the spray paint brush and radius squared
  const r = speed + minRadius
  const rSquared = r * r

	// set the number of times we lerp the points in the for loop
	const lerps = 10

  // repeat the random points with lerping
  for (let i = 0; i < lerps; i++) {

    // find the lerped X and Y coordinates
    const lerpX = lerp(mouseX, pmouseX, i / lerps)
    const lerpY = lerp(mouseY, pmouseY, i / lerps)

    // draw a bunch of random points within a circle
    for (let j = 0; j < sprayDensity; j++) {

      // pick a random position within the circle
      const randX = random(-r, r)
      const randY = random(-1, 1) * sqrt(rSquared - randX * randX)

      // draw the random point
      point(lerpX + randX, lerpY + randY)
    }
  }
}
The last function we need to modify is our toothpick() paintbrush function. This one draws long and thin toothpick-shaped ellipses using the ellipse() function. There are multiple ways we could modify our toothpick shapes: for example, we could use brushSize to modify their width, height, or both.
The third and fourth parameters of the ellipse() function are the width and the height of the ellipse. So to modify the width, we could change the third parameter, and to modify the height, we could change the fourth parameter. However, to maintain the toothpick shape, we only want to modify the width of the toothpick, so we'll only change the third parameter here in our call to the ellipse() function:
// draw the toothpick-shaped ellipse
ellipse(0, 0, distance * 2 * brushSize + minSize , minSize)
And here is our full toothpick() function after this one modification:
function toothpick() {
  // set the brush style
  noStroke()

  // move the origin (0,0) to the current mouse point
  translate(mouseX, mouseY)

  // find the angle of the direction the mouse is moving in
  // then rotate the canvas by that angle
  const angle = Math.atan2(mouseY - pmouseY, mouseX - pmouseX)
  rotate(angle)

  // set minumum width and height of the toothpick-shaped ellipse
	const minSize = 4

	// find the distance between current mouse point and previous mouse point
	const distance = dist(mouseX, mouseY, pmouseX, pmouseY)

	// draw the toothpick-shaped ellipse
  ellipse(0, 0, distance * 2 * brushSize + minSize , minSize)
}
✅ Code checkpoint 29
Calling setupBrushSizeSlider() in setupToolbox()
And finally, we can call setupBrushSizeSlider() in our setupToolbox() function so that it shows up in our toolbox. We'll place it within our Styles category by passing in paintStyles as its parent container.
function setupToolbox() {
  // set up paint style tools in the Styles category
  const paintStyles = select('section.toolbox div.styles-tools')
  setupBrushSelector(paintStyles)
  setupPaintColorPicker(paintStyles)
  setupRainbowColorButton(paintStyles)
  setupOpacitySlider(paintStyles)
  setupBrushSizeSlider(paintStyles)

  // set up canvas tools in the Canvas category
  const canvasTools = select('section.toolbox div.canvas-tools')
  setupSaveButton(canvasTools)
  setupResetButton(canvasTools)

  // set up background style tools Background category
  const backgroundStyles = select('section.toolbox div.background-tools')
  setupBgColorPicker(backgroundStyles)
}
Now that we've finished setting up our slider, try it out for yourself by painting on the canvas with different brush sizes!
✅ Code checkpoint 30
Adding keyboard shortcuts
At this point, we've created a whole bunch of toolbox elements that allow us to control how we paint on the canvas! Let's make it a bit easier to use some of these tools by adding keyboard shortcuts.
Watching out for any key presses with keyPressed()
The p5.js library has a built-in function called keyPressed(), which gets called whenever the user presses any key on the keyboard. Let's start by defining our keyPressed() function:
function keyPressed() {

}
Checking which key was pressed with key and keyCode
While the keyPressed() function gets called every time any key gets pressed, we can set up shortcuts for specific keys by checking two special p5.js variables: key and keyCode.
The
keyvariable saves the most recently pressed normal key like a letter, number, or punctuation mark. Letters are saved as lowercase strings like's'and'k', since thekeyvariable is not case sensitive.The
keyCodevariable saves the value of the most recently pressed special key. The list of special keys includesBACKSPACE,SHIFT,CONTROL,RIGHT_ARROW,LEFT_ARROW, and more. You can view the full list of special key codes at thekeyCodepage in the p5.js documentation.
In more technical terms, the key variable holds the most recently pressed ASCII key, whereas keyCode holds the most recently pressed non-ASCII key.
Checking the keyCode for special key presses
Let's try this out by creating our first keyboard shortcut! We can make a keyboard shortcut that resets the canvas by calling the resetCanvas() function whenever the user presses the BACKSPACE special key.
Within our keyPressed() function, let's create an if statement that checks if the most recently pressed key has a keyCode value of BACKSPACE. If that's true, then we'll reset the canvas:
if (keyCode === BACKSPACE) {
    resetCanvas()
}
And now, if you press the BACKSPACE key after having painted something, the canvas should reset!
Checking the key for letter key presses
To create a keyboard shortcut for saving the canvas as an image file, we can add on an else if statement that calls our saveFile() function if the user presses the 's' key:
else if (key === 's') {
  saveFile()
}
We can also create a keyboard shortcut that toggles ifRainbowColor between true and false, so that the user can easily switch between painting with a single paint color or with rainbow. If the user presses the 'r' key, we'll set our ifRainbowColor variable to be the opposite of its current value:
else if (key === 'r') {
  ifRainbowColor = !ifRainbowColor
}
Now if you try pressing the BACKSPACE key, s or r, you'll trigger any of our keyboard shortcuts. Try it out!
✅ Code checkpoint 31
Conclusion
At long last, our very own painting application is complete! Pat yourself on the back, and go make a mess on your canvas!
So what's up next in the third Painting with Code guide? We'll continue building upon this project by adding even more advanced tools to our painting app!
Building our own creative tools like this gives us full control over how our painting process unfolds. Although the buttons, color pickers, and sliders are common features in most basic painting apps, these are just a starting point for you to dream beyond. You can customize anything and everything, and you don't have to stop here. What else can you add to your toolbox? We'd love to see what you create!
Additional learning resources
The p5.js website has several useful guides and step-by-step tutorials for learning to use p5.js. It also has a great p5.js reference page for all the p5.js functions used here in this guide.
The Coding Train has a huge trove of p5.js tutorials, and is run by Daniel Shiffman, who is dedicated to creating accessible, beginner-friendly learning resources for creative coding.
If you'd like to learn more advanced drawing and interaction techniques with p5.js, check out SuperHi's Math for Creatives and Experimental Typography for the Web courses.
Arianna Ninh is an Educator at SuperHi, where she supports students in embracing the messy magic of learning something new. She hails from the San Francisco Bay Area and loves hiking outdoors in the SF fog (aka Karl). Outside of SuperHi, you can find her attempting to make food or weird sculptures, or daydreaming in a park somewhere.